Four years ago had you told me that I would become an artist I would have laughed at you. I had never had an interest or an aptitude for art of any kind. But over the last four years I have learned to draw and paint using the techniques of the Renaissance masters. It all began with a class that I took through Moorhead Community Education. I was fascinated by the following class description:
Classical Realism Part 1: Drawing
Create an oil painting in the tradition of the old masters in the first of this three part series. No experience in art is needed for impressive results in class, and experienced artists are welcome to try a method from a new perspective. Join instructor, Frank Tebay, who has more than seven years of training from Frank Covino, a master painter and educator. Learn the techniques and history of Italian Renaissance painting while immersing yourself in the creative process. You will be guided step-by-step, from understanding the importance of a grid and controlled palette, to underpainting and glazing methods. Bring two photos to the first class (two 8x 10 copies; one in color and one in black and white). Images of old masters' paintings are encouraged. Fee includes supplies. Co-sponsored with Plains Art Museum. . .
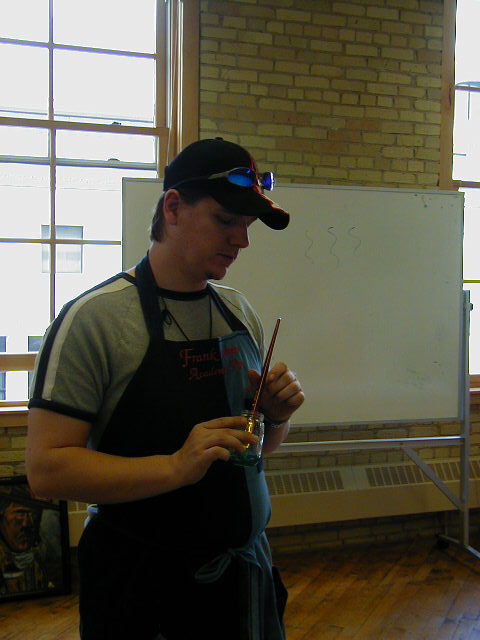
Frank Covino developed his approach after conducting research into the methods used by the Renaissance Masters to teach their students both how to draw and paint. He focused particular attention on the methods of Leonardo da Vinci.
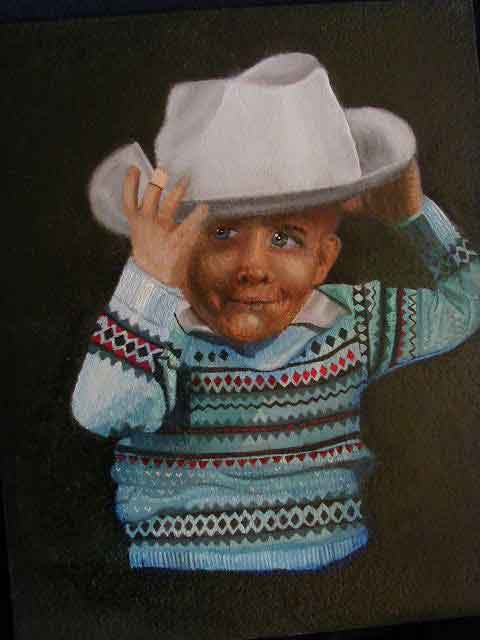
Leonardo da Vinci, in his translated notes, tells of a suggestion to his students on how to make accurate linear measurement of lengths, widths, angles, and intervals. He used a giant graph, an empty frame over which he strung twelve equidistant horizontal strings and twelve equidistant vertical strings. Leonardo placed this graph upright between the model and the artist's line of vision. The student's canvas was also graphed, scaled in direct ratio to the master graph. A piece of wax was placed on any given wire on the large graph, so that the artist might line up the form accurately when he returned to each new painting session. This simple graph, or scaling device, is an effective way of studying a model in order to make a correctly proportioned drawing. . . If you use photographs of the model or scene you want to paint, you can employ a variation of the da Vinci device. Placed under acetate or glass, the photograph can be squared off in proportions that are in scale to the size of the squares on a pregraphed canvas. The Fine Art of Portraiture the academic approach, Frank Covino pgs. 24-27 (1970).To understand Frank Covino's Academic Approach better I will take you step by step through the procedure that he uses. I will be using William A. Bouguereau's "The Prayer" to demonstrate the majority of the process. I have chosen this painting because it is one in which I have photographed in most of the steps of the process. As of this writing I have not yet completed the color painting. So while you wait for my completed version of the Bouguereau to be posted I have provided you with other paintings which I have in various stages at this point. You will also notice that I give you the Italian or French words for various terms throughout this web site, I do this because that is the manner in which I was taught, and also because the Renaissance Masters were from these countries and because I think that it adds a bit of the rich heritage passed down in this tradition.


 I created this line drawing by taking a black and white
copy of William A. Bouguereau's "The Prayer" and placing it under an
acetate graph drawn with a red Twin Tip marker (using the ultra fine
end). The acetate graph was half the size of the drawing
done on the gessoed* board. On a separate piece of acetate which I
secured to the graph with tape I then traced with a black Twin Tip
marker (using the ultra fine end) the contour of
the form and all the important features, including lines which depict
the shadows I saw on the original. When I began transferring the
drawing
from the acetate to the board I felt that all of the important features
of the little girl were close enough to the graph lines that no further
additional lines were necessary to properly depict her features.
However, that will not always be the case. If further lines
are necessary a third color of marker is used to draw oblique lines
where the features of the face are not close enough to a graph lines.
These oblique lines may be created by drawing a line from any point
where two red graph lines cross or from any terminal point of the red
graph lines at the borders of the rectangle. The oblique lines will be
then transferred to the gessoed board as well prior to starting the
line drawing. Frank has further refined his system by asking that
students use red conte' pencil to create the graph and a blue conte'
pencil for oblique lines (other, more waxy, pencils should not be used
because they may create problems with the painting itself). By
using the same colors to create the graph and oblique lines any
confusion during the drawing process may be minimized. Once all
the graph and additional lines are in place then the transfer of the
line drawing itself can begin using either a charcoal pencil or vine
charcoal. The key to transferring the line drawing is to try not to
think about what is being drawn (i.e. "I've never been able to draw
noses!") and think only about the lines of the form in relation to the
graph lines in each box. By drawing slowly, moving from box to
box, drawing only the lines seen until each box is completed the
drawing takes shape more accurately. However, to check accuracy
use either a ruler while drawing, to check each box as it is drawn, by
turning the board and acetate graph
upside down checking to see that both the board and acetate look the
same from every angle; or by holding the drawing up to a mirror. Any
necessary corrections can be made with a kneaded eraser or by lightly
scraping with an X-acto knife. For a more detailed explanation
see Controlled Painting,
Frank Covino pgs... 52-58 (1982). Once the line drawing has been
completed India Ink** should be used to draw a small brush over each
of the lines of the drawing. India Ink may also be drawn on with
a brush into any areas of the drawing which would be black. The
only areas which are black are those areas which do not reflect
light. Normally this includes the pupil's of the eye, the line in the
center
of the mouth and the nostril. The Bouguereau has two other areas
which are black--the strap of the jumper is Black Velvet which means
that the area nearest the viewer will be black and finally the area
under the hands and arms is also black. While the background may
appear to be black it is actually a Value 1.
I created this line drawing by taking a black and white
copy of William A. Bouguereau's "The Prayer" and placing it under an
acetate graph drawn with a red Twin Tip marker (using the ultra fine
end). The acetate graph was half the size of the drawing
done on the gessoed* board. On a separate piece of acetate which I
secured to the graph with tape I then traced with a black Twin Tip
marker (using the ultra fine end) the contour of
the form and all the important features, including lines which depict
the shadows I saw on the original. When I began transferring the
drawing
from the acetate to the board I felt that all of the important features
of the little girl were close enough to the graph lines that no further
additional lines were necessary to properly depict her features.
However, that will not always be the case. If further lines
are necessary a third color of marker is used to draw oblique lines
where the features of the face are not close enough to a graph lines.
These oblique lines may be created by drawing a line from any point
where two red graph lines cross or from any terminal point of the red
graph lines at the borders of the rectangle. The oblique lines will be
then transferred to the gessoed board as well prior to starting the
line drawing. Frank has further refined his system by asking that
students use red conte' pencil to create the graph and a blue conte'
pencil for oblique lines (other, more waxy, pencils should not be used
because they may create problems with the painting itself). By
using the same colors to create the graph and oblique lines any
confusion during the drawing process may be minimized. Once all
the graph and additional lines are in place then the transfer of the
line drawing itself can begin using either a charcoal pencil or vine
charcoal. The key to transferring the line drawing is to try not to
think about what is being drawn (i.e. "I've never been able to draw
noses!") and think only about the lines of the form in relation to the
graph lines in each box. By drawing slowly, moving from box to
box, drawing only the lines seen until each box is completed the
drawing takes shape more accurately. However, to check accuracy
use either a ruler while drawing, to check each box as it is drawn, by
turning the board and acetate graph
upside down checking to see that both the board and acetate look the
same from every angle; or by holding the drawing up to a mirror. Any
necessary corrections can be made with a kneaded eraser or by lightly
scraping with an X-acto knife. For a more detailed explanation
see Controlled Painting,
Frank Covino pgs... 52-58 (1982). Once the line drawing has been
completed India Ink** should be used to draw a small brush over each
of the lines of the drawing. India Ink may also be drawn on with
a brush into any areas of the drawing which would be black. The
only areas which are black are those areas which do not reflect
light. Normally this includes the pupil's of the eye, the line in the
center
of the mouth and the nostril. The Bouguereau has two other areas
which are black--the strap of the jumper is Black Velvet which means
that the area nearest the viewer will be black and finally the area
under the hands and arms is also black. While the background may
appear to be black it is actually a Value 1. 
Above Frank Covino
demonstrates
the use of Faber-Castell Pitt Artist Pens in Gray which is used in the
same manner
as India Ink.


b. Rub-out Technique


If I wore a bright yellow scarf that is as light in value as a ninth value gray, and I walked away from you, the brilliance of the yellow would appear less intense (duller) as the distance between us became greater. The scarf would not appear less yellow; the hue would remain the same. If the light in the distance was intense, the scarf might even retain its ninth value status on a scale between black (zero, the absence of light) and white (ten, or one hundred percent of light). The only difference is that the yellow appears less bright as it recedes; it becomes duller. Controlled Painting, Frank Covino pg. 109 (1982).
Aerial perspective tells us that close objects appear brighter and
distant objects appear duller. Thus, an apple in your hand will
appear brighter than the same apple in someone else's hand fifty-five
feet away from you. See Controlled
Painting, Frank Covino pg. 110 (1982).
Renaissance painters discovered that the gray-green tones of
verdaccio underpaintings weakened the intensity of high chroma colors
superimposed, if those bright hues were applied either thinly by
glazing
or the opaque color was partially wiped off. From this the
practice of mixing
neutral gray in with colors to dull its brilliance before application
in those areas of the painting requiring duller tones was
established. Neutral gray is made by mixing Ivory Black and
Titanium White which creates a blue-gray. To eliminate the
blueness caused by the Ivory
Black yellow tones must be added. So Raw Umber is added at value
1, Raw Umber plus Raw Sienna for values 2 and 3, Raw Sienna for value
4, Raw Sienna and Yellow Ochre for value 5, Yellow Ochre for value
6-9. The neutral gray pigment added to the color was matched with
the value of the color itself. So for instance, cadmium yellow a
value 9 color would require a value 9 neutral gray to weaken its
intensity (to make it duller). Whereas, Burnt Umber a value 1
color
would require a value 1 gray to dull it. See Controlled Painting,
Frank Covino pgs. 110-112 (1982). For a complete discussion of
the ten hues and the use of neutral gray to create color palettes see Controlled Painting,
Frank Covino pgs. 112-118 (1982). For a complete discussion of
the Color Wheel's Color Schemes and Harmonic Relationships see Controlled Painting,
Frank Covino pgs. 122 (1982).
The color of the lighting should also be used in all the colors that will be used in
a painting. By use of a particular color to establish a time of
day outdoors, or the type of lighting used indoors, all of the colors
in the painting are unified. Using the Controlled Color Palette,
the light source color is added in the row of neutral grays.
Since all of the colors on the palette will be modified by the use of
the neutral grays, each color will receive the color of the light as
well. Indoors there are only two types of lighting which should
be used, incandescent and candlelight or firelight. Outdoors
there are many types of lighting that must be considered. Controlled Painting,
Frank Covino pgs. 132-134 (1982).
Color paint is applied in the same manner as was discussed above in
the verdaccio section. Please refer to the information given
above.
Paint should be partially removed from the following areas to allow
the verdaccio to show through.
Glazing is
the use of medium with a small amount of paint crushed carefully on the
side of the jar so that all the paint is mixed evenly through the
paint. Frank Covino has his own medium formula which is: 5
parts Damar Varnish, 5 parts Rectified Turpentine, 3 parts Stand Oil
and 1 part Venice Turpentine. Controlled
Painting,
Frank Covino pg. 137 (1982). Glazes may be applied directly over
the verdaccio or over opaque color paint applications. It is
possible to do as many as three glazes in one area on a painting at a
time. How many glazes does it take to complete a painting?
The Renaissance Masters stated that 40 to 100 glazes may be applied to
a painting. Below are two
photos. The first shows the picture prior to the application of
glaze and the second was taken after glazes had been applied.

To me this is the most magical portion of this process. The flesh
comes to life and the colors of everything else are just made more
beautiful. It is with glaze that anything may be changed as you
will see in some of my other art work below.
Once the painting and glazing have been completed to the artist's
satisfaction it must be allowed to dry for 8 to 12 months. At
this point three coats of Damar Varnish are applied. However,
Damar Varnish may only be applied on days that are dry and clear to
prevent a phenomenon known as clouding.